


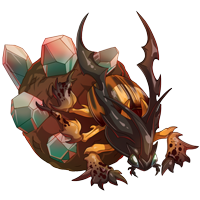
Gregori
(#71609049)
Level 1 Aberration


Familiar
Mineral Minder


Click or tap to view this dragon in Predict Morphology.
Energy: 49
out of
50
This dragon’s natural inborn element is Light.
Female Aberration
This dragon cannot breed until May 17, 2025 (18 days).
This dragon is an ancient breed.


Expand the dragon details section.
Collapse the dragon details section.
Personal Style

Ancient dragons cannot wear apparel.
Skin

Effect
Scene

Measurements
Length
5.05 m
Wingspan
8.41 m
Weight
401.05 kg
Genetics
Driftwood
Pharaoh (Aberration)
Pharaoh (Aberration)
Antique
Bee (Aberration)
Bee (Aberration)
Antique
Glowtail (Aberration)
Glowtail (Aberration)
Hatchday
Breed
Eye Type
Level 1 Aberration
EXP: 0 / 245


STR
6
AGI
6
DEF
6
QCK
5
INT
8
VIT
8
MND
6
Lineage
Parents
Offspring
- Lyon
- Zarathustra
- Lash
- Mourn
- Adwen
- Cedrela
- Maovesa
- Zillen
- Hayate
- Torador
- Nazoc
- Aera
- Kettricken
- Slate
- Alnilam
- Skelly
- Seriadne
- Sylphide
- Khashada
- Lelli
- Sefrond
- Mechlem
- Adalee
- Addavar
- Andis
- Rheanna
- Ashera
- Vorrutyer
- Reran
- Undrad
- Lark
- Naton
- Zhora
- Maelrys
- Shilan
- Athosar
- Crescent
- Doben
- Baulson
- Iayu
- Pagus
- Kylie
- Cadash
- Graff
- Amberlee
- Nuvy
- Estel
- Orlina
- Crisiux
- Balmar
- Renelle
- Reine
- Cen
- Fion
- Palak
- Llyr
- Soren
- Talise
- Lemanruss
- Mandan
- Gardenia
- Volcanus
- Mahs
- Rygar
- Devon
- Nephele
- Maul
- Shiroi
- Demeter
- Anastas
Biography

General Farming


Solo dragon for speed-farming festival currency from the Bamboo Falls down. He can 2-hit-scratch or 1-hit-elim all monsters. Type was picked randomly, it doesn't matter.
Which venue should you farm fest currency in? It changes occasionally, check Here.


This team 1-hit-eliminates everything in these venues. Arbitrary types.
Thunderhead Savannah * Redrock Cove * Waterway * Arena * Volcanic Vents


Rainsong Jungle and Boreal Forest
(Isolillock by himself if you want 2 fodder in Boreal, but it's really not worth it)
Fodder Trainers

Crystal Pools
fodder will level slowly, but it's chill and has pretty apparel drops.

Harpies Roost
Using the Harpies build Here. Don't use haste to build breath, unlike ghostlight/mire.

Ghostlight Ruins
better than the mire? You have a decent chance of taking down a boss here, and less chance of needing to restart in general. My favorite to train in.

Mire
low chance of killing a toad boss, but it can happen if you're lucky.


Kelp Beds


Forbidden Portal
if farming, take along Gaspereau.
Boss Farming

Boss farming in the Crystal Pools


Boss farming in the Golem Workshop
Clan Index
all my level 25 dragons
Coli Calculator


Click or tap a food type to individually feed this dragon only. The other dragons in your lair will not have their energy replenished.
Feed this dragon Insects.
Feed this dragon Meat.
Feed this dragon Seafood.
Feed this dragon Plants.
You can share this dragon on the forums by either copying the browser URL manually, or using bbcode!

Exalting Gregori to the service of the Lightweaver will remove them from your lair forever. They will leave behind a small sum of riches that they have accumulated. This action is irreversible.
Do you wish to continue?
- Names must be longer than 2 characters.
- Names must be no longer than 16 characters.
- Names can only contain letters.
- Names must be no longer than 16 characters.
- Names can only contain letters.