


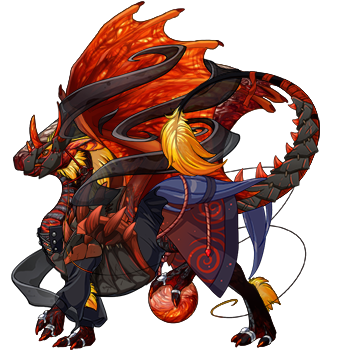
Inuyasha
(#63872338)
Mire Monk


Click or tap to view this dragon in Predict Morphology.
Energy: 50/50
This dragon’s natural inborn element is Earth.
Male Pearlcatcher
This dragon is hibernating.


Expand the dragon details section.
Collapse the dragon details section.
Personal Style
Apparel


Skin

Scene
Measurements
Length
6.73 m
Wingspan
5.88 m
Weight
688.23 kg
Genetics
Sanguine
Laced
Laced
Sanguine
Edged
Edged
Garnet
Glimmer
Glimmer
Hatchday
Breed
Eye Type
Level 25 Pearlcatcher
Max Level


STR
119
AGI
10
DEF
6
QCK
61
INT
7
VIT
33
MND
7
Biography
This Dragon has the basic Mire Monk Build but with a silver mediate.
Here is how to use from This thread
Basic Usage
So you've got your monk, you've got two dragons you want to train in your party with it, what do you do first?
Step One: Swamp Meditation
Go to the Mire, and check out your the starting group of enemies. The Mire Monk can set up on most groups, but there are a couple you'll want to avoid. If the starting group contains:
either wartoad
2 or more healers (Wetland Unicorn or Salve Kamaitachi)
2 or more mages that your monk is weak to
...then you should leave the Mire and come back.
Once you've got a decent starting group, use Meditate.
In most cases, you should use Meditate again. Yes, you heard me.
If are up against a group containing a healer, a mage that your monk is weak to, or a group of 4 enemies, you should go straight to the next step without using Meditate again. You can also just Meditate the one time if you only need one or two battles worth of EXP.
Step Two: Chill For A Bit
As I mentioned in the introduction, after generating a ton of breath, Meditate applies a 3-turn cooldown, shown by a blue icon by your monk's name. While this cooldown is active, you do 75% less physical damage, which is bad.
You will need to stall out for the rest of the cooldown. This seems silly, but if you managed to get those two Meditates in, you'll have way more breath than you would have generated by just using Scratch.
To stall, use (in order):
Haste (improves quick, giving you more turns; also +5 breath)
Rally (improves strength, allowing you to 1-shot every enemy; also +5 breath)
Defend (halves all damage for next turn)
You may want to switch up Defend and Rally if you're up against a group containing a Scythe Kamaitachi; check the turn order to see when you'll be hit the most.
Ideally, during these turns, your enemies have opted to attack the dragons you're training, rather than your Monk. Regardless, with the Monk's natural bulk and the use of Defend, you probably haven't taken too much damage.
Step Three: The Reckoning
Once you have satisfied the following conditions:
over 35 breath
rally is active (orange strongarm icon is visible)
meditate cooldown is over (blue meditate icon is no longer visible)
Proceed to use Eliminate on all remaining enemies. Prioritize, in order:
healers
attackers
any mages that haven't attacked yet
anything remaining
Or whatever works for you and your monk. You'll get the hang of it pretty quickly.
If you're completely unfamiliar with the Mire's enemies, brokenstone wrote a great guide on them here.
Step Four: Grind
At the start of every subsequent battle, use Rally first. At 119 STR, a Mire Monk can Eliminate every regular enemy in the Mire, but only after using Rally first.
Occasionally, but not often, Eliminate will miss enough that you'll run out of breath. Depending on how much health you have, what enemies you're up against, your mood, the phase of the moon, et cetera, you can either reset or try to get your breath back, using the same meditate-haste-rally-defend setup as you started with. Always remember Meditate's 3-turn cooldown and to make sure that Rally is active before using Eliminate.
Captchas can also interrupt your rhythm, so be extra conscientious about using Rally after solving them.
Aaand at some point, you may run out of health or breath and need to leave the Mire and come back. I can't promise NO wipeouts or resets, just fewer.

Click or tap a food type to individually feed this dragon only. The other dragons in your lair will not have their energy replenished.
Feed this dragon Insects.
This dragon doesn't eat Meat.
This dragon doesn't eat Seafood.
Feed this dragon Plants.
You can share this dragon on the forums by either copying the browser URL manually, or using bbcode!

Exalting Inuyasha to the service of the Icewarden will remove them from your lair forever. They will leave behind a small sum of riches that they have accumulated. This action is irreversible.
Do you wish to continue?
- Names must be longer than 2 characters.
- Names must be no longer than 16 characters.
- Names can only contain letters.
- Names must be no longer than 16 characters.
- Names can only contain letters.