Hi,
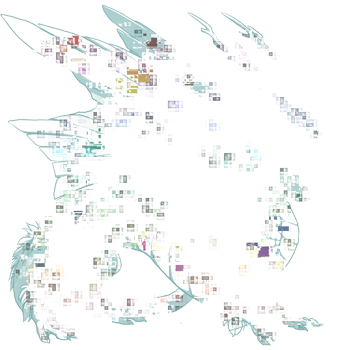
I'm still fairly new to digital art and I'm completely new to skins/accents. But I've downloaded the Female Imp template and have created 'something' on the accent layer. However, when I try to follow the rest of the tutorial it's a little difficult because I don't have photoshop, I'm using Krita. I was hoping there might be someone else using Krita for creating skins/accents who might be able to tell me what I need to do with the layers at the end in Krita?
Specifically this section:
'Turn off the visibility of the skin parts folder and select all existing layers by clicking the top layer, holding shift, then clicking the bottom layer. Select the “Merge Visible” command.
Do not flatten your image. Doing so will negate the transparent areas of the image. Accents that do not have transparent backgrounds will not be accepted. If you have transparency turned off your dragon will be covered by a giant square of white paint with some accents thrown on top.'
And then not just as a krita question but a skin/accent question in general, the final file I save for an accent, should you see any of the dragon where I didn't draw anything? or only the accent areas I drew on?
Better yet, does someone have an example of an accent they uploaded so I can see what was visible on the final png file?
Sorry if these are newbie questions, but I'm struggling a bit this first time with the process despite re-reading the tutorial!
Thank You :)
@HerCosmosComplex What it means by turning off the visibility, it means to turn off the layers. There should be a little icon on each layer that looks like an eye. Click that to turn off the visibility. You'll need to turn off the visibility of the folder named "skin parts"
For the merge bit, if you right click the layers, there should be something along the lines of "Merge Below", I don't remember what it is exactly though.
If you did all that correct, you should be left with only the accent parts that you drew and no dragon parts showing around it.
This is my accent here for an example of what it should look like when uploaded.
[skin=24045]
[img]https://images-wixmp-ed30a86b8c4ca887773594c2.wixmp.com/intermediary/f/990bf114-b436-4d75-8345-ff585a273429/dd1qcw5-1473c59f-855a-4d2c-a899-9ef99f3f32f2.png[/img]
@
HerCosmosComplex What it means by turning off the visibility, it means to turn off the layers. There should be a little icon on each layer that looks like an eye. Click that to turn off the visibility. You'll need to turn off the visibility of the folder named "skin parts"
For the merge bit, if you right click the layers, there should be something along the lines of "Merge Below", I don't remember what it is exactly though.
If you did all that correct, you should be left with only the accent parts that you drew and no dragon parts showing around it.
This is my accent here for an example of what it should look like when uploaded.


Thank you for the tips @HeadlessJason This was helpful. I found in Krita it wasn't working quite right still until I clicked a certain button on the layers.
I do have another question. I finished and I think it's all good at the right size/png but when I view the image from the file rather than Krita it has extra pixels around the skin. I notice this happens if I save images from the flight rising website too. I don't know how to stop this/remove those extra pixels... will my skin be rejected because of them? And if so how do I fix this when I don't see the extra pixels in my paint program? Here's some images to kind of explain what I mean.
The first shows my skin in Krita:
[img]https://i.ibb.co/sKvHWGw/435ertgdhr67td.jpg[/img]
And this one shows what it looks like when I view the PNG:
[img]https://i.ibb.co/0m7R28k/453654746546.jpg[/img]
Thanks Again!
Thank you for the tips @
HeadlessJason This was helpful. I found in Krita it wasn't working quite right still until I clicked a certain button on the layers.
I do have another question. I finished and I think it's all good at the right size/png but when I view the image from the file rather than Krita it has extra pixels around the skin. I notice this happens if I save images from the flight rising website too. I don't know how to stop this/remove those extra pixels... will my skin be rejected because of them? And if so how do I fix this when I don't see the extra pixels in my paint program? Here's some images to kind of explain what I mean.
The first shows my skin in Krita:

And this one shows what it looks like when I view the PNG:

Thanks Again!
@
HerCosmosComplex quick reminder; bumping threads is against the rules outside of sales.
To me, it looks like the resizing might have made those white pixels appear. I don't remember what the resizing options are in Krita though, so maybe someone else can help you with that. I think it should be called something like "bicubic"
Oh, whoops! Sorry, I didn't actually realise that, I don't normally stray much from the sales forums, I guess I better go back and read the rules, it's been a while since I joined/read them!
Okay. Thank you for trying to help, I'm going to submit and see what happens, I don't know if it would actually be an issue because when I preview the skin on a forum post here the extra pixels don't appear. It might just be the program I'm using to view png's in (ACDSee).
As a general principle, don't think of Krita as a "program". Think of it as a digital simulation of pencils and brushes. There's some technical aspect worth knowing, but mostly, you need ordinary drawing/painting skills. I use my XP-Pen Star 06
digital Painting tablet with Krita .
A typical newbie error is to create a new document, and then begin drawing on "layer 1". This default layer is filled with white, and not at all good for painting. So lock it, and create a new, transparent layer to paint on.
GOOD DEFAULT VIEW:
In the drop-down at the upper-right, select “Big_Paint”
SOME BASIC SETUP:
Open the Tool Options docker, and set the Brush Smoothing to “None”. Also, make sure “Snap to Assistant” is turned off.
You will most likely need to finetune the overall brush pressure. Go to Settings>Configure Krita... and select Tablet Settings. Adjust the curve to your liking.
THINGS I NEVER DO:
-- I never use the undo function. If I want to fix a mistake, I press E to toggle the eraser.
-- I never resizes the brush. If I need a larger brush, I pick another. The only time I hold down Shift to resize the brush is in eraser mode when I want the eraser to be larger.
MY FAVORITE SHORTCUTS:
Tab Toggle GUI
Ctrl-Shift-F Toggle fullscreen
Ctrl-0 100% pixel Scale
2 Fit drawing on screen
M Mirror view (makes you see your drawing in a new light)
E Toggle Eraser mode for your brush
Space-LMB Move canvas
Shift-space-LMB Rotate canvas
Ctrl-LMB Pick color
Shift-LMB Resize brush
@
wangshi I see you're really new so in the future you should make sure that the topic you're replying to is recent! This thread in particular is almost a year old at this point and "necroing" a thread is usually frowned upon. Awesome information otherwise, though!
@
wangshi I see you're really new so in the future you should make sure that the topic you're replying to is recent! This thread in particular is almost a year old at this point and "necroing" a thread is usually frowned upon. Awesome information otherwise, though!


