Hello!
I'm Speedy and by popular demand I finally made a "tutorial" but this is more of a walk through of my process than a "how to draw"
but I may make more of these in the future!
Thanks for looking and I hope this is somewhat helpful?
P.S If you draw something using my tutorial plz show me! id love to see!
Notes before you begin:
- Familiarize yourself with your drawing program. dont be afraid to experiment!
- Im using Paint Tool Sai for this but most drawing programs have the same basic tools
- References are your friend! Make sure you at least have your dragons image open somewhere. Some good references to look at for drawing dragons are pictures of snakes, crocodiles, Bat wings and birds.
- This is just a guide you dont have to follow it exactly
- Dont get discouraged just keep trying!
click images to see larger versions
Step 1: My workspace
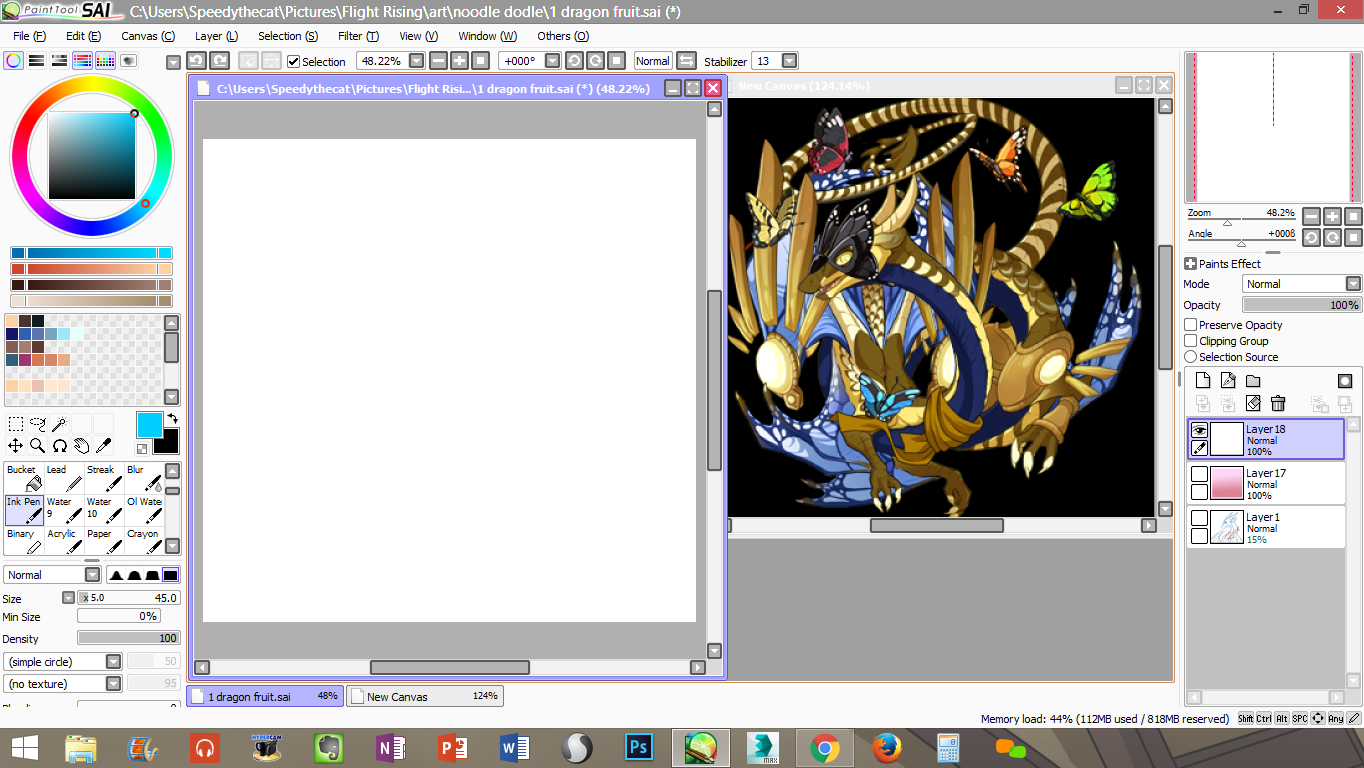
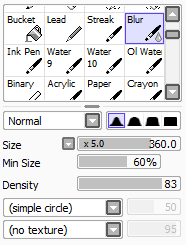
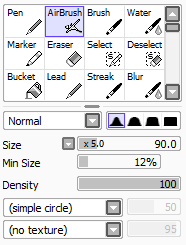
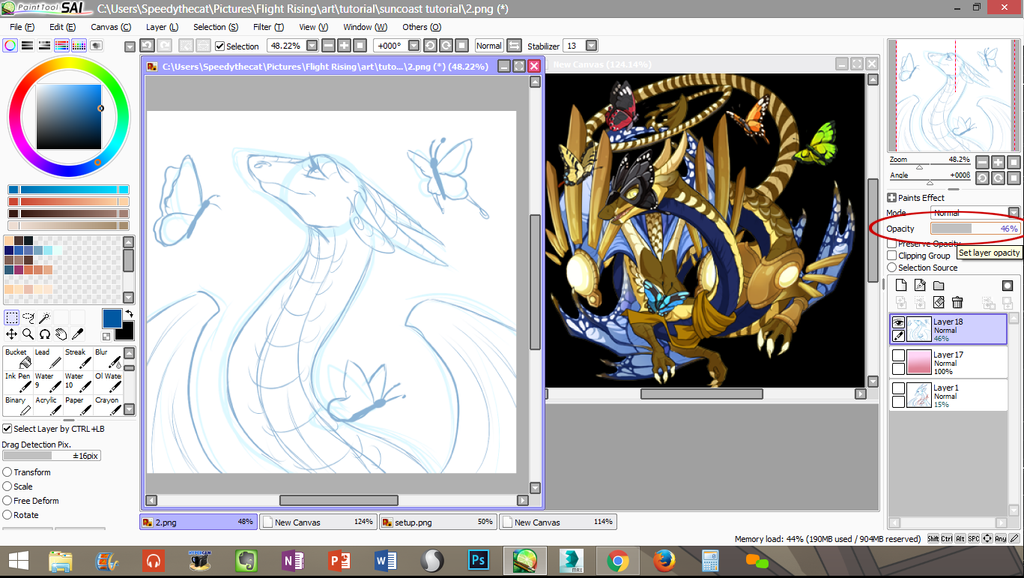
This is my general workspace in Paint Tool Sai, I have my canvas open on the left and my reference image open on the right. My canvas size is (1022 x 1002). My stabilizer is always set to 13. Below are my brush settings for my Pen, Ink Pen, Airbrush and Blur tools. These are usually the only brushes I use for these.
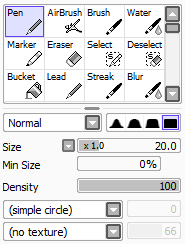
Pen: This is the brush I use for sketching, but it really doesnt matter which brush you use for sketching, I just prefer this brush. To make this brush right click on an empty slot and select "pencil" and use these settings: http://i.imgur.com/wf6dHFV.pngStep 1: My workspace

This is my general workspace in Paint Tool Sai, I have my canvas open on the left and my reference image open on the right. My canvas size is (1022 x 1002). My stabilizer is always set to 13. Below are my brush settings for my Pen, Ink Pen, Airbrush and Blur tools. These are usually the only brushes I use for these.


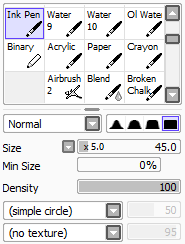
Ink Pen: I love this brush! This is the only brush I use for inking. To make this brush right click an empty slot and select "brush" and use these settings: http://i.imgur.com/StT46Xf.png
Blur: The settings for my blur tool, I use blur to soften shading and make gradients
Airbrush: This is the tool I use for softer shading
Step 2: Rough Sketch
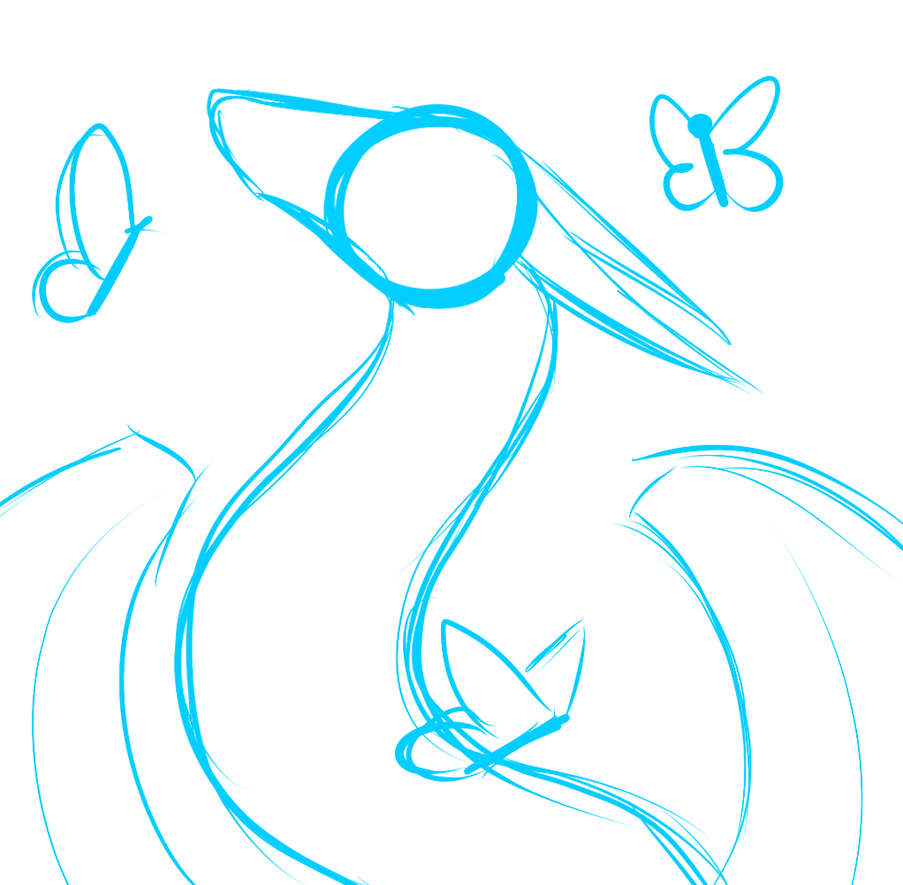
This is what my rough looks like, there are no details in this stage but you should be able to get the idea for the pose you are trying to achieve. Remember the rough sketch doesn't have to be pretty or anything fancy. I always sketch in blue. This should be done as your first layer and kept as your first layer. When im finished with this step I lower the opacity.
Step 3: Refined Sketch
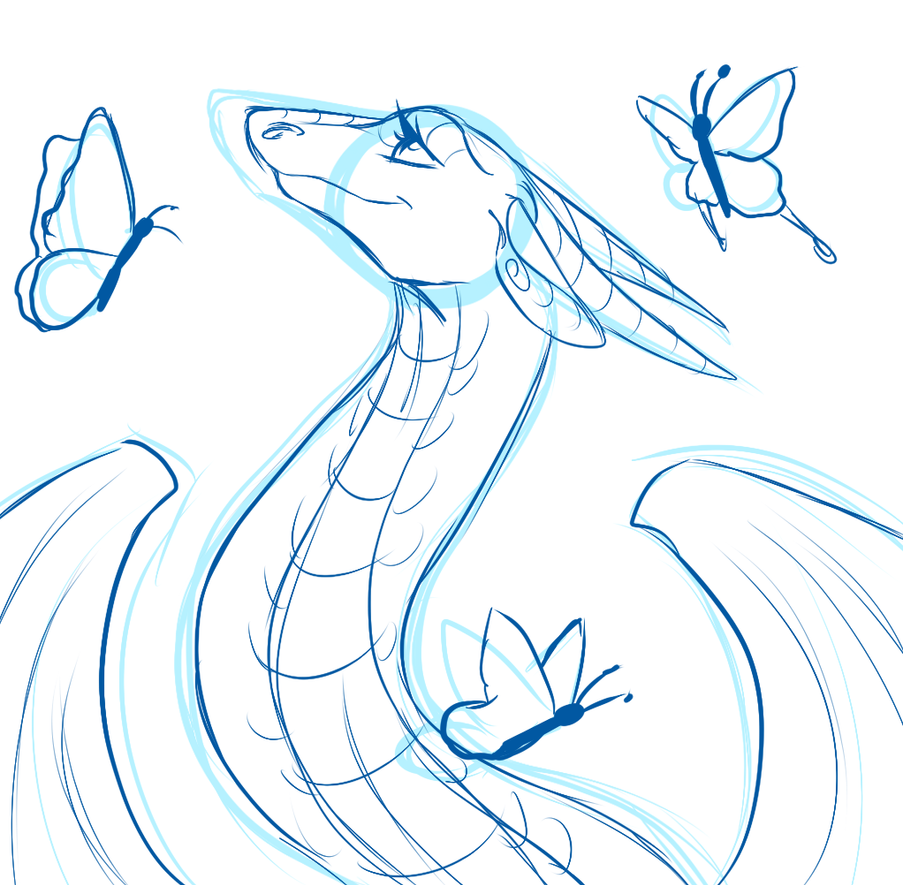
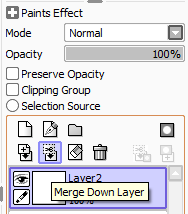
Next I make a new layer and choose a darker blue color and I sketch ontop of my rough, this is where I add some details. This doesnt have to be pretty either but it should look better than your rough. Then I merge this layer with the rough and lower the opacity.
It should now look something like this
Step 4: Apparel Sketching
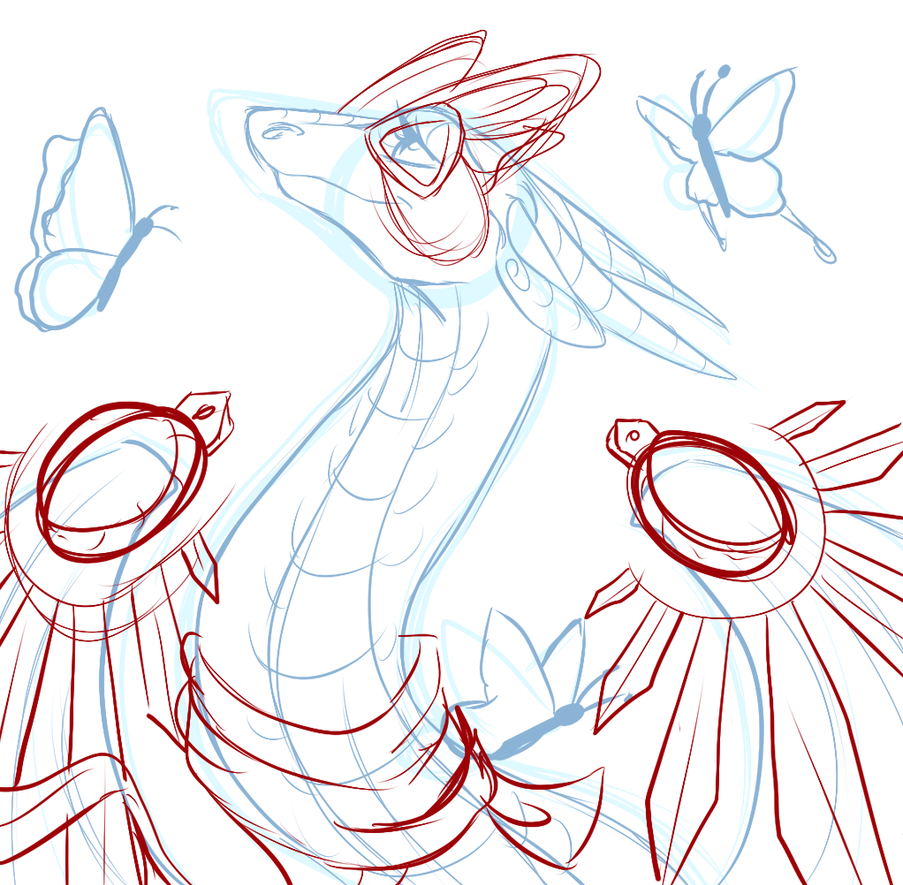
If your dragon has no apparel you can skip this step. I make a new layer and I sketch in the apparel, usually in red. Then I lower the opacity down some and merge this with the lower sketch. This is when your sketch is finished. Make sure this is how you want your drawing to look before proceeding.
Step 5: Inking
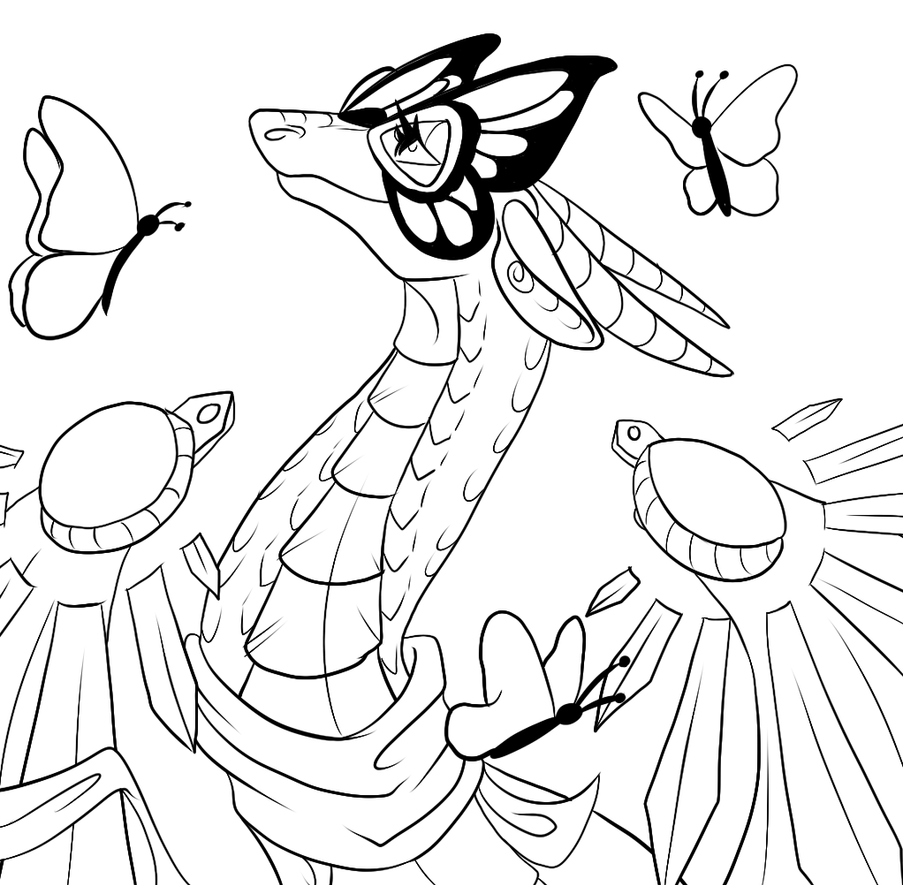
I usually minimize my reference at this point and concentrate on inking at full size. Ink on a layer above your sketch. Be sure to zoom in and out while inking! Dont be afraid to rotate the canvas either. Ink slowly and with confidence. If a line doesnt look smooth or correct undo and try again and again until it looks right.
Use your full arm as well as your wrist to draw with a more controlled hand. I have a really shaky hand and locking your wrist and drawing using your arm/shoulder really helps to stabilize lines. you can also go back over lines to make them smoother or thicker. I hide my sketch when its done, you can hide it by clicking the small eye icon next to the layer.
Step 6: Setting up for color
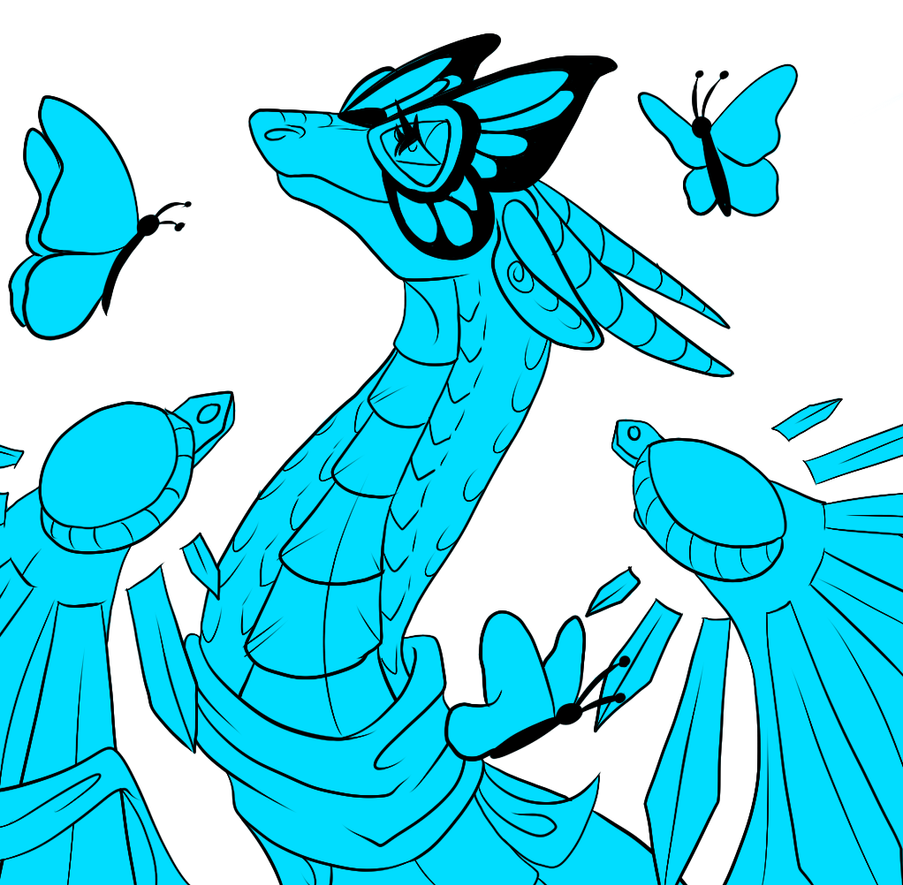
I make a new layer under my inking layer and I scribble down some color making sure to fill in the lines completely. It looks like below
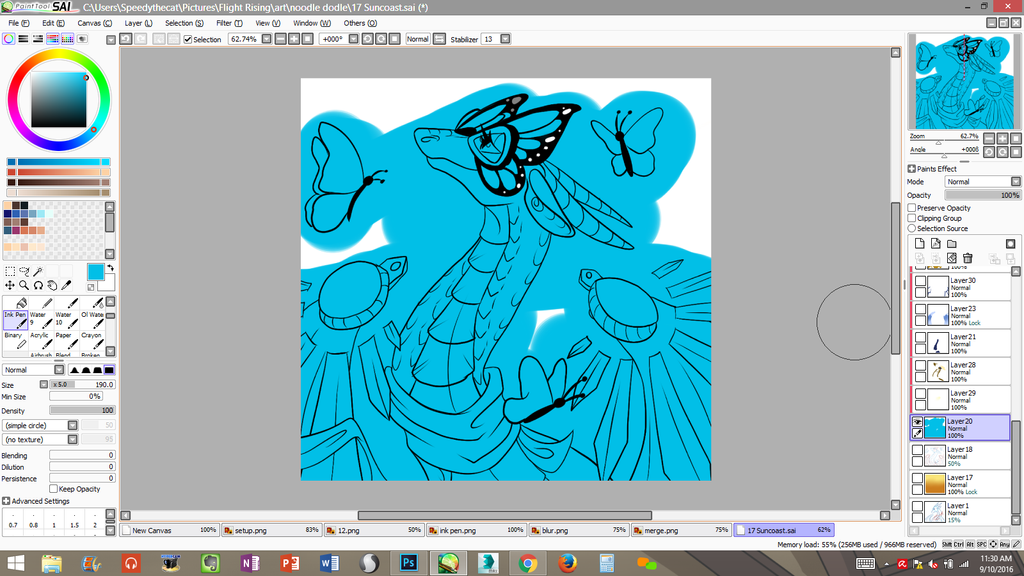
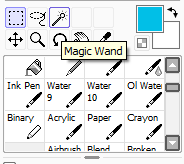
Then I select my ink layer by clicking on it and I select the magic wand tool.
Next I click on the parts where I DONT want color. If you try to select something and parts dont select correctly you most likely have a gap in your inked lines. you must find the gap and fix it.
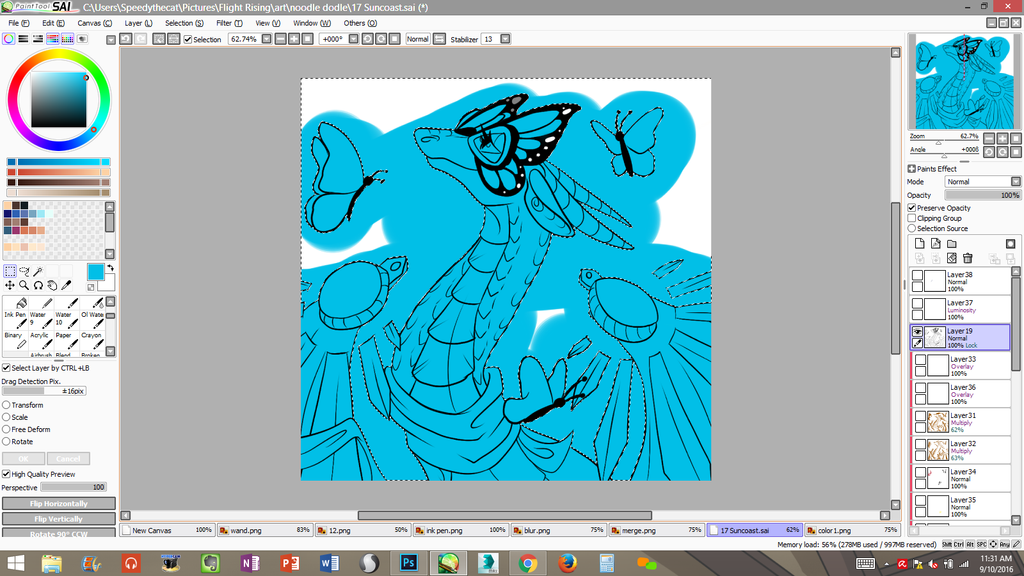
Next, on the color layer, I erase over the image. Now you should have something like this

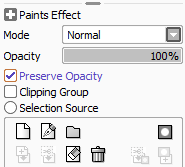
Make your you check the "Preserve Opacity" box!! This enables you to color now without going outside of the lines! This should be your best friend.
Step 7: Flat Color
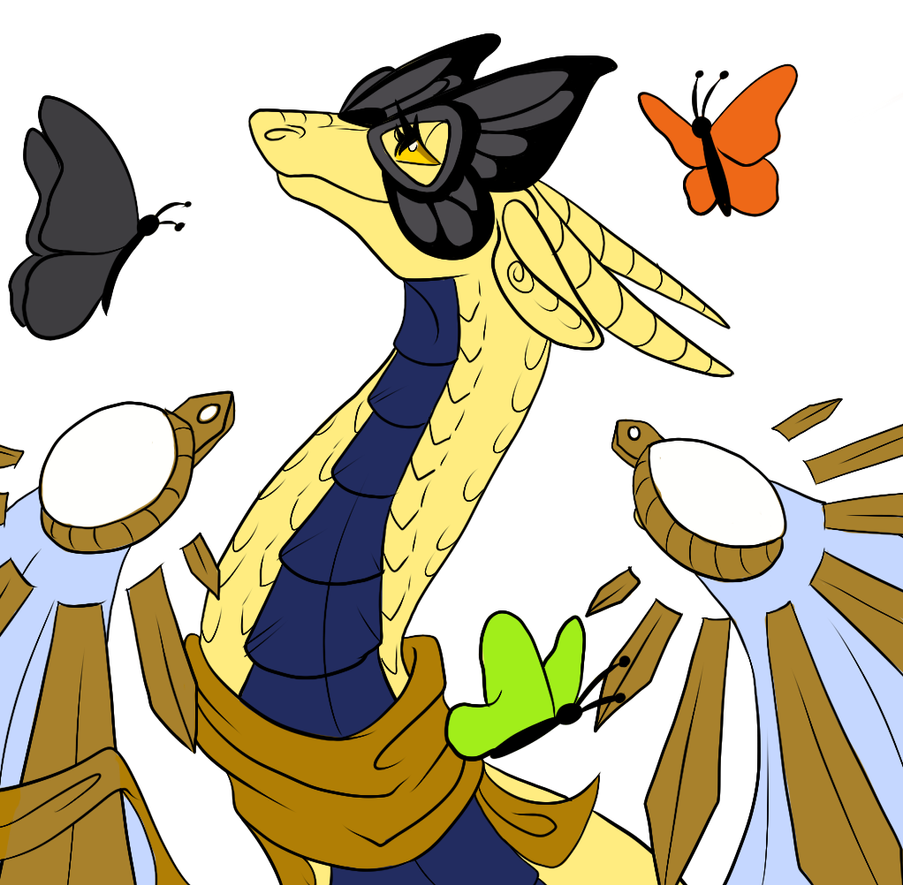
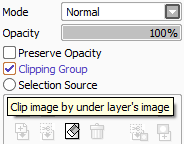
Next I lay down my flat colors. I color pick these right from the official dragon art but you could just eyeball it. I color these by hand using the ink pen. I do NOT do the flat colors on the same layer. I use what is called a "Clipping Group" in Photoshop its a clipping mask. I use clipping layers alot.
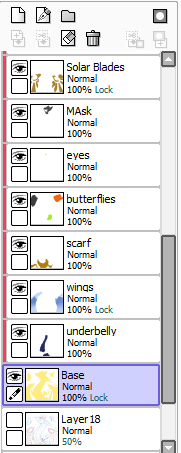
This is what my layers and clipping layers generally look like during base color stage
I never actually name these but I did it for this tutorial
Step 8: Gene's
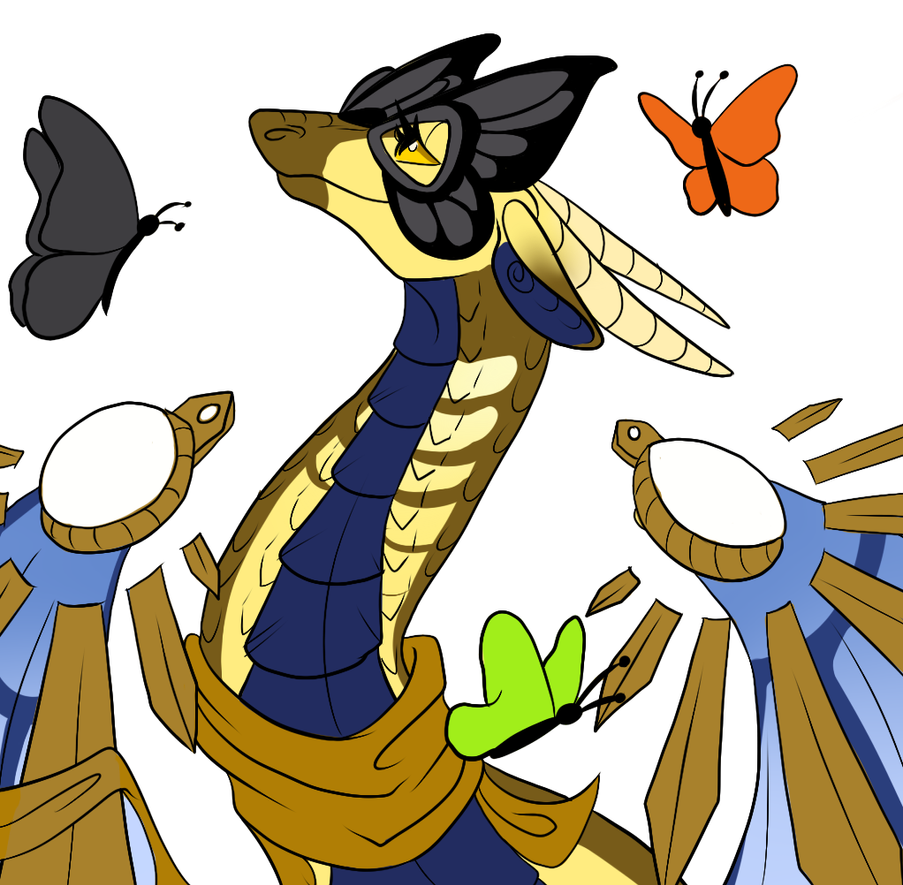
Next I do Gene's. I did Cherub underneath all my other clipping layers but above my base color. I did butterfly above the wings but under everything above it.
Step 9: Shading
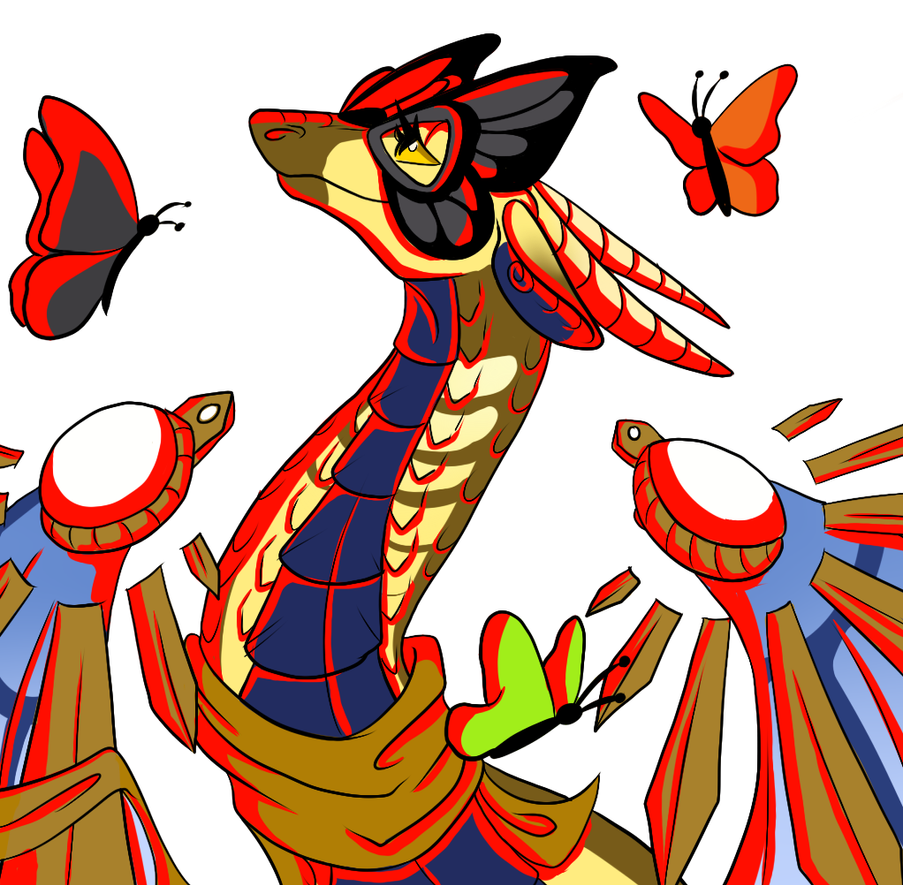
Still using the pen tool I choose a bright color and make a new clipping layer above all the other ones and underneath my inks. Then using this bright color I color where I want my image to be shaded.
I use a bright color so I can see what Im doing.
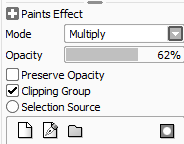
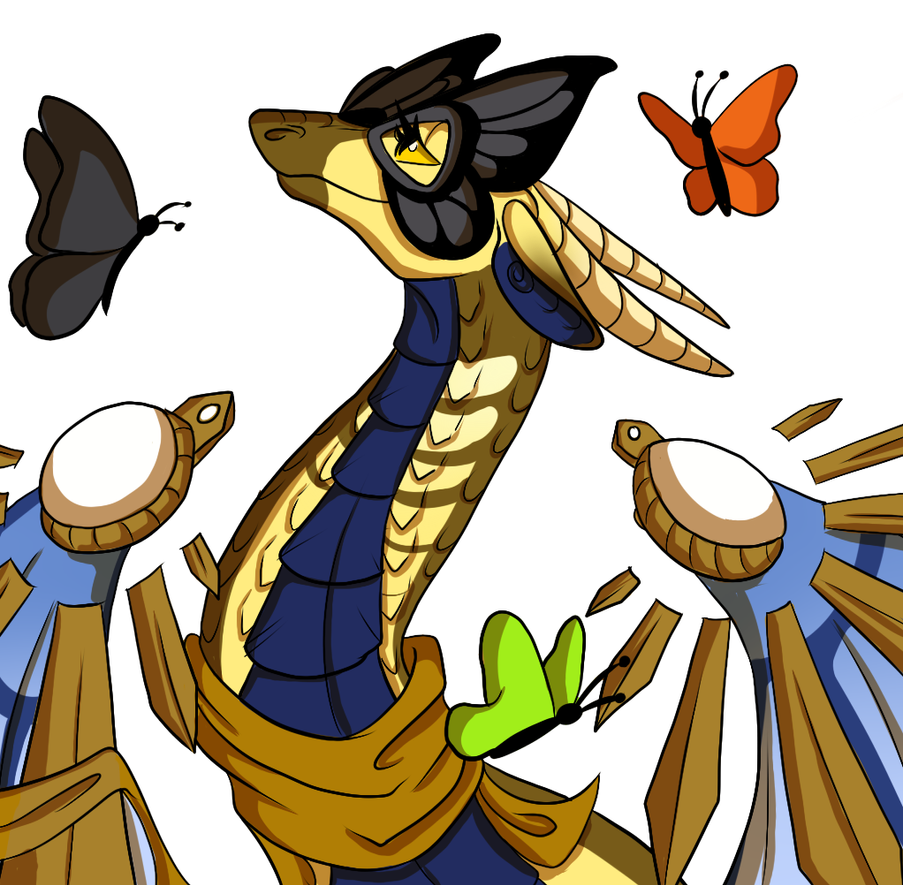
Then I Preserve Opacity on my shading layer and I choose a dark color. The dark color depends on the dominant color of the drawing. In this case, Yellow, so I choose a dark yellowish/brown. I then select the layer mode to "Multiply" and lower the opacity to my liking.
Step 10: Soft Shading
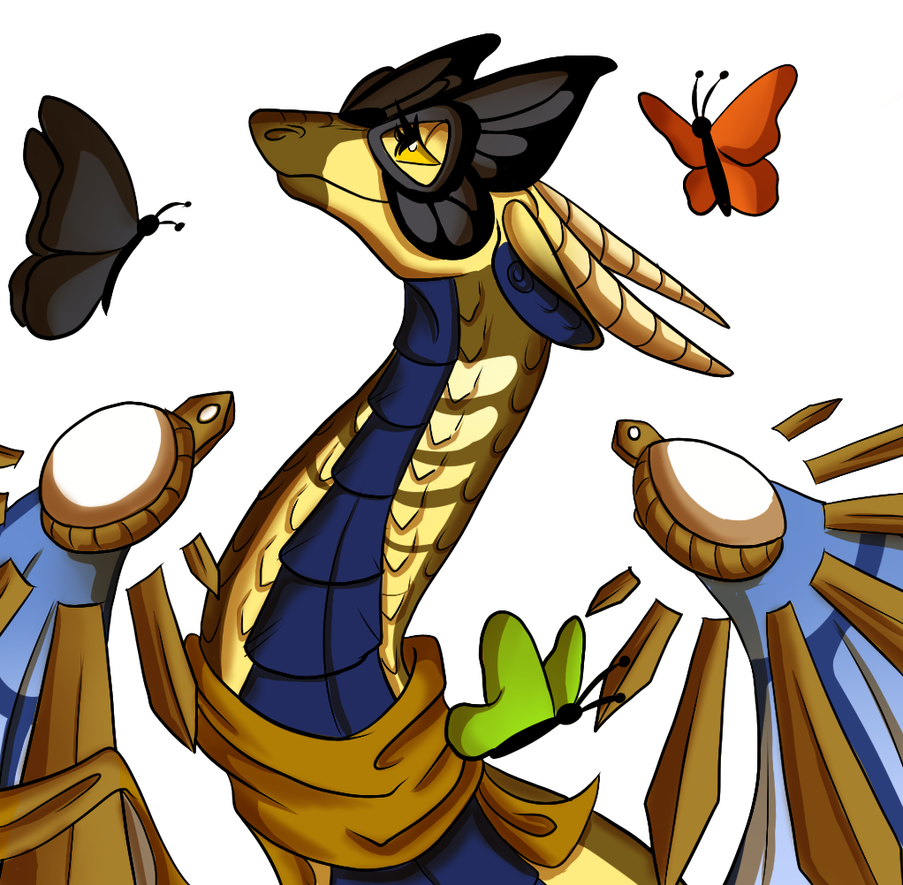
Next I make a layer underneath my shading layer. I use the same settings (Multiply/Opacity) and I use the same dark shading color. I use the airbrush and the blur tool for this. This is to make your drawing a little more round. I mainly just go over the areas I already shaded
Step 11: Highlights
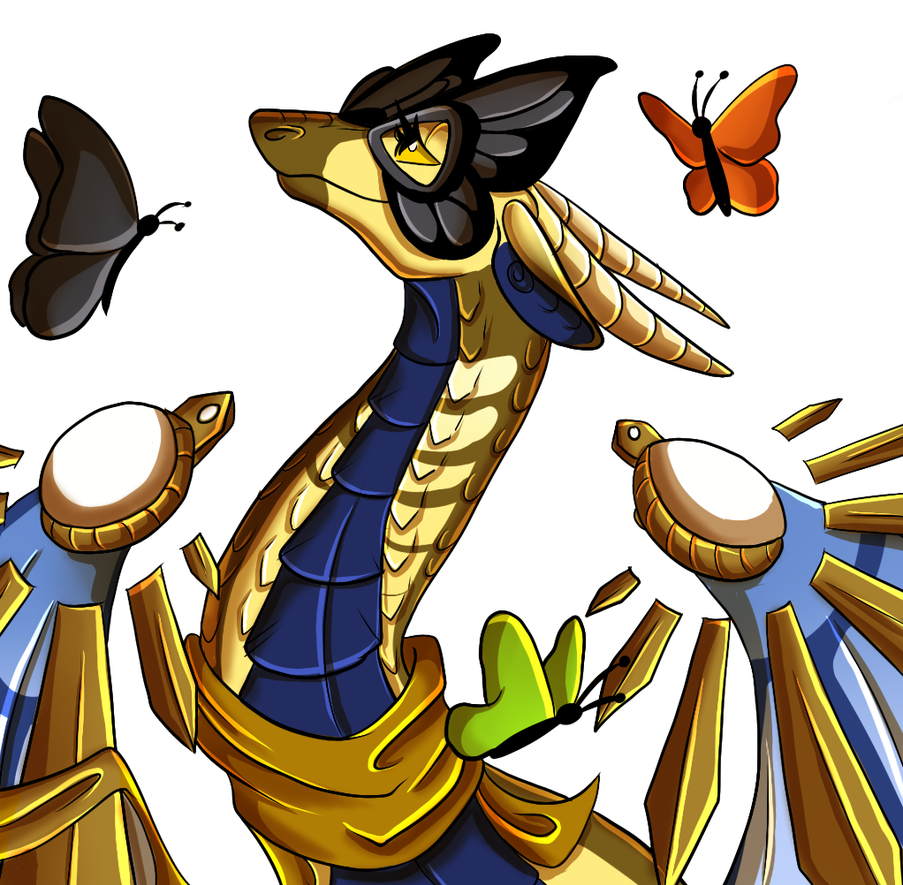
On a new layer above my shading layers I change the layer mode to "Overlay" and choose pure white as my color.
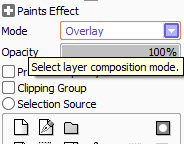
I add some highlights using my pen tool. This step helps further make your drawing less flat!
Step 12: Some Finishing Touches
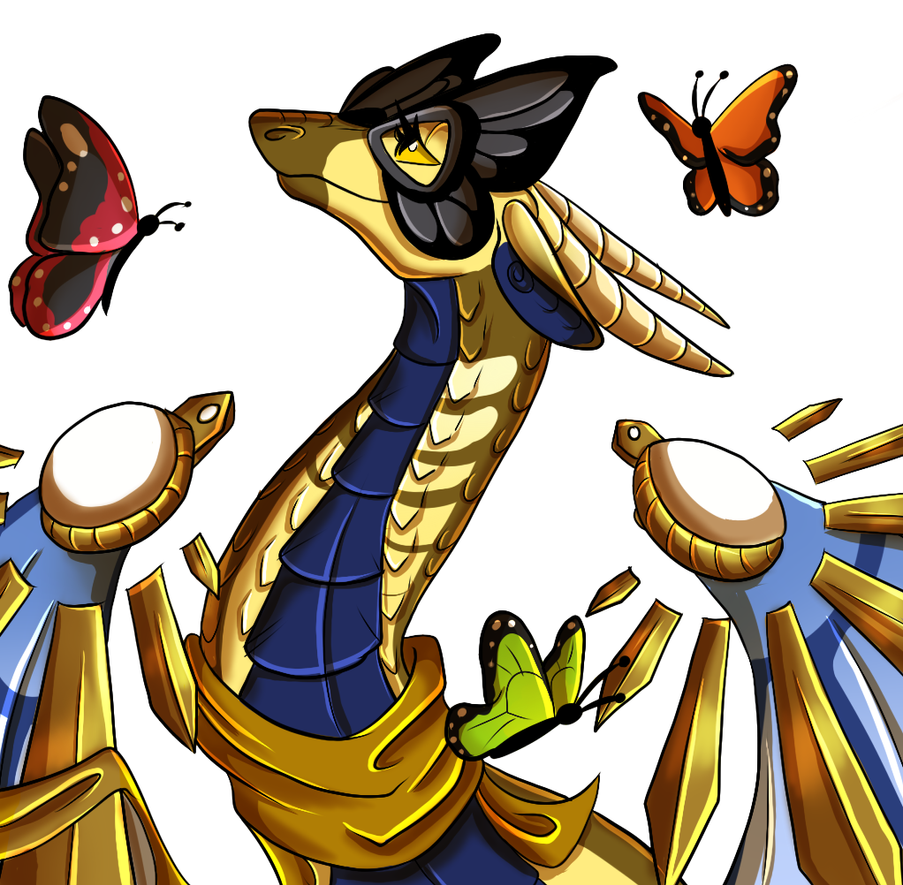
I finished up the butterflies and used another overlay layer to make the wings look more like metal
Step 13: Last details
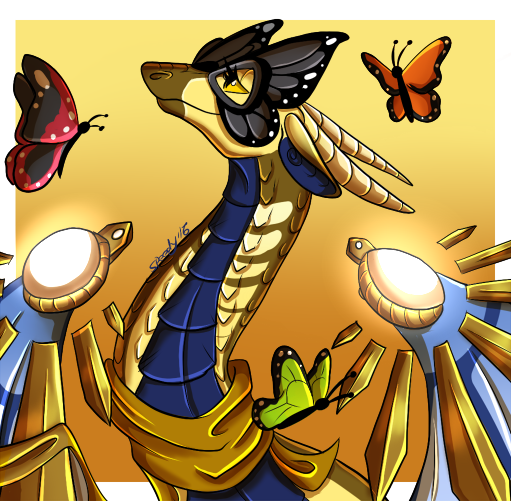
I added a square background with a gradient (using the blur tool), I added white dots to her mask and I added a luminosity layer over my lineart and colored over that part on the solar blades to make it glow. I signed it as well.
Step 14: Resize and Finish!
The last step is I resize my image usually by 50% to make it smaller. This helps make your lines look smoother and hide potential mistakes! I always save my drawings as png's
And the drawing is finished!

I hope this was somewhat helpful to you...feel free to ping me if you have any questions!
I also have some speedpaints on my youtube that might help you see my process better
https://www.youtube.com/watch?v=Z_3299nJTg0
https://www.youtube.com/watch?v=rNw4wrdND6M
https://www.youtube.com/watch?v=0t2y7fgDmIc

This is what my rough looks like, there are no details in this stage but you should be able to get the idea for the pose you are trying to achieve. Remember the rough sketch doesn't have to be pretty or anything fancy. I always sketch in blue. This should be done as your first layer and kept as your first layer. When im finished with this step I lower the opacity.
Step 3: Refined Sketch

Next I make a new layer and choose a darker blue color and I sketch ontop of my rough, this is where I add some details. This doesnt have to be pretty either but it should look better than your rough. Then I merge this layer with the rough and lower the opacity.

It should now look something like this

Step 4: Apparel Sketching

If your dragon has no apparel you can skip this step. I make a new layer and I sketch in the apparel, usually in red. Then I lower the opacity down some and merge this with the lower sketch. This is when your sketch is finished. Make sure this is how you want your drawing to look before proceeding.
Step 5: Inking

I usually minimize my reference at this point and concentrate on inking at full size. Ink on a layer above your sketch. Be sure to zoom in and out while inking! Dont be afraid to rotate the canvas either. Ink slowly and with confidence. If a line doesnt look smooth or correct undo and try again and again until it looks right.
Use your full arm as well as your wrist to draw with a more controlled hand. I have a really shaky hand and locking your wrist and drawing using your arm/shoulder really helps to stabilize lines. you can also go back over lines to make them smoother or thicker. I hide my sketch when its done, you can hide it by clicking the small eye icon next to the layer.
Step 6: Setting up for color

I make a new layer under my inking layer and I scribble down some color making sure to fill in the lines completely. It looks like below

Then I select my ink layer by clicking on it and I select the magic wand tool.

Next I click on the parts where I DONT want color. If you try to select something and parts dont select correctly you most likely have a gap in your inked lines. you must find the gap and fix it.

Next, on the color layer, I erase over the image. Now you should have something like this

Make your you check the "Preserve Opacity" box!! This enables you to color now without going outside of the lines! This should be your best friend.

Step 7: Flat Color

Next I lay down my flat colors. I color pick these right from the official dragon art but you could just eyeball it. I color these by hand using the ink pen. I do NOT do the flat colors on the same layer. I use what is called a "Clipping Group" in Photoshop its a clipping mask. I use clipping layers alot.

This is what my layers and clipping layers generally look like during base color stage
I never actually name these but I did it for this tutorial

Step 8: Gene's

Next I do Gene's. I did Cherub underneath all my other clipping layers but above my base color. I did butterfly above the wings but under everything above it.
Step 9: Shading

Still using the pen tool I choose a bright color and make a new clipping layer above all the other ones and underneath my inks. Then using this bright color I color where I want my image to be shaded.
I use a bright color so I can see what Im doing.
Then I Preserve Opacity on my shading layer and I choose a dark color. The dark color depends on the dominant color of the drawing. In this case, Yellow, so I choose a dark yellowish/brown. I then select the layer mode to "Multiply" and lower the opacity to my liking.


Step 10: Soft Shading

Next I make a layer underneath my shading layer. I use the same settings (Multiply/Opacity) and I use the same dark shading color. I use the airbrush and the blur tool for this. This is to make your drawing a little more round. I mainly just go over the areas I already shaded
Step 11: Highlights

On a new layer above my shading layers I change the layer mode to "Overlay" and choose pure white as my color.

I add some highlights using my pen tool. This step helps further make your drawing less flat!
Step 12: Some Finishing Touches

I finished up the butterflies and used another overlay layer to make the wings look more like metal
Step 13: Last details

I added a square background with a gradient (using the blur tool), I added white dots to her mask and I added a luminosity layer over my lineart and colored over that part on the solar blades to make it glow. I signed it as well.
Step 14: Resize and Finish!
The last step is I resize my image usually by 50% to make it smaller. This helps make your lines look smoother and hide potential mistakes! I always save my drawings as png's
And the drawing is finished!

I hope this was somewhat helpful to you...feel free to ping me if you have any questions!
I also have some speedpaints on my youtube that might help you see my process better
https://www.youtube.com/watch?v=Z_3299nJTg0
https://www.youtube.com/watch?v=rNw4wrdND6M
https://www.youtube.com/watch?v=0t2y7fgDmIc


